Showing posts with label handmade. Show all posts

Friday, June 13, 2025

Just a Little Crochet Project...


It's been over 30 years since I picked up a crochet hook. I've never worked with bulky yarn either but it is so soft and lovely that I couldn't resist it. I've taken so many rows out and re-done them, it's ridiculous. I'm determined to make this scarf with even rows though. I'm getting close to the length I want it to be, then it's on to making tassels. I know, it's a hot project for summer. I actually started back in late winter, but life became busy and I didn't finish it. My plan is to get it done before September so I can start on a couple of other crochet projects that I want to make for Christmas gifts. I got a spectacular deal on yarn at newly opened thrift store in our little town!! 

How's your summer going? Are you working on any special projects? Leave me a comment and let's chat!


Wednesday, July 1, 2015

'Vintage' Baby Girl Mini Album

It's been a while since I posted any craft projects. This is a mini album I made for my first granddaughter,
who is getting ready to turn 3!


Yes, I know. 

But I really did make the album almost two years ago so I'm only behind in posting the photos. :)

And speaking of photos, my daughter took these as I didn't have a very good camera at the time. I totally forgot about them and found them on a shared drive the other day. That's what really prompted me to post them. Otherwise, I would have happily gone through life thinking I didn't have any pictures of it to share. *snort*


I purchased a canvas mini album from the craft store. I don't remember which one as it has been so long but if I find another one I am buying it too. I really enjoyed working with the canvas!

The pearls are Prima, and most of the flower embellishments are probably Prima, but I handmade a few flowers from the scrapbook paper, too.

I'm famous for finding odd craft supplies for a discount and then trying to piece them all together.
 Another great place to buy supplies is Mighty Dollar.

Seriously.

They are cheap but name brands!


I made plenty of little pockets to slip things into, along with tags.

I love tags!

Okay, this picture looks a little green. I don't remember using green ink. 
My go-to ink is Soft Suede by Stampin'Up!
Embroidery floss is magic. Really. It makes such a pretty addition to any page!


There's that nasty green tint again. Hmmm...could have been my editing but I'm not claiming it. :)
There's a homemade flower up there^^^. Those are fun to make. Just cut out a circle (doesn't have to be perfect), dampen it with water and wad it up, let dry, unfold and layer with another one, adding a pearl or button. VoilĂ , you are done!


More handmade flowers!


Of course it's vintage themed because that's what I like best!


Lots of tags for journaling! Prima pearls and stamping, oh yeah!


See, it really is Soft Suede around the edges. Looks way better than green. :)


I love the side view!!!

Mini albums are my favorite craft to make. I now have several more that need putting together, so I think part of my summer will be busy. 

Oh, not for my daughter! Only one more for her baby who just turned one. 

But I have a new grand nephew, and two new grand nieces!


Have you been creating anything fun lately? Do share!

~Happy Crafting~


Sharing at

The Enchanting Rose


Thursday Favorite Things Button

http://www.the-chicken-chick.com/2015/07/clever-chicks-blog-hop-146-with-chicken.html


Sunday, February 23, 2014

The Art of Embroidery

In our family, my mother-in-law is known for her expertise in needlework. 
From sewing to quilting to embroidery, her art is superlative. 

 (Clicking on photos will enlarge them so you can see even more detail.)
Here she is adding finishing touches of grass to an embroidered *barn. 
Y'all know I ♥ barns, right? 


And she has incorporated a Cardinal in the design, too. 
Oh, I love birds!


I love how authentic the Pine Tree looks.


When she is finished, there will be four designs and she will quilt them 
together to form the wall hanging. Isn't this awesome?! The first square is finished. 
It's so much more dramatic in person. I can't wait to see all four pieces put together.


 Did you know the earliest surviving embroideries are Scythian and date back to the 5th-3rd centuries BCE? There's a form of embroidery called Blackwork, where they only use black thread to make the designs and twist it in a certain way to give it dimension. I'm not sure what technique my MIL used on the barn but it seems awfully close to Blackwork. 

And look at this finished wall hanging...


Isn't it phenomenal?!

It's an ancient art form of Embroidery called Thread Painting or Needle Painting.

And the detail is absolutely stunning.


Can you tell that my mother-in-law's reputation is well deserved? 
But being the humble woman that she is, she'll be the first to tell you that it is a gift from the Lord. 

: : : : :

When I started writing this post I was only intent on sharing how much I admire and love my MIL's ability with a needle. I was going to attach a Scripture verse here but I have to say that after knowing her for 33 years, she is truly the epitome of the Proverbs 31 woman. She is an awesomely dedicated wife, mom, MIL, grandmother and great grandmother who aptly fits the description. She has always put the welfare of her family first. Her faith in the Lord and love for hearth and home is what is to be admired. Her handiwork with a needle second. She may or may not read this post but I want to say Thanks, Mom. I love you. 

Have a blessed day in the Lord, my friends!

*The barn pattern is by Beth B Dix/ Primrose Lane, Black Mountain, NC. 

Sharing with
The Chicken Chick

Monday, January 27, 2014

Journal52 Week 3: You Make Me Smile

Can I just say that I am LOVING watercolors?!
I'm so enthralled with all the combinations and textures you can get mixing the colors. I've been watching some Youtube tutorials this past week and WOW...there are gazillions of them out there! 

I found one that was right up my alley. The artist's name is Samie Harding. She blogs at Journal Girl. What I liked most about her video series is that they are short, and she gets her hands messy! I mean messy!!! I loved it! And after watching, this is what I came up with for this week's prompt:


This is a closeup of the right hand corner. I'll list the colors I used but I can't remember the exact order, other than I know I started with a base layer of Prussian Blue and Crimson Red, adding Orange Yellow and Lemon Yellow with a tad bit of Yellow Ochre for some subtle 'sunny' highlights. I used some White along with the Crimson Red to get the pink tones at the top. 

BUT FIRST!!! I applied an all over coat of Gesso with a plastic card, then took another sheet of card stock and laid it on top, smoothing it with my hand. Then I carefully and slowly peeled it off to reveal those fantastic ripples!!! Leave to dry for 24 hours or use a heat gun, being careful not to burn the paper!


To make my faux flower design, I used a journal card from Making Memories and carefully outlined the shape. Tracing over it with a Prismacolor Premier marker in black really helped make it pop! I snagged that marker from my son's art supplies but don't tell him. Maybe he won't notice ;)


I drew the flower stalk and leaves (I don't draw well but it was fun trying). The paper flowers are some I had in my stash from Making Memories. I added some rhinestone bling so they would sparkle because you can never have too much sparkle. Right, ladies?

(The page really has more green tones than showing in this photo. You can see them better in the one above.)

Following along with the theme of someone who makes me smile, I immediately thought of my husband. He is the one person guaranteed to coax a smile or a laugh from just about anyone! He truly has a phenomenal sense of humor and quick wit. He is my SUNSHINE! I drew the sun on a separate piece of card stock after water coloring it with the yellows. Plus I spritzed it with some Sheer Shimmer Spritz in Frost. I glued it down with Tombow Mono (my favorite adhesive) and outlined it with the Prismacolor marker. After contemplating the emptiness of the sun, I then chose to journal some in the rays, which I think is kind of cute. I will journal more about him in the flower area that I left blank but that will be private :)

A few things I decided this week:
Use watercolor paper and not card stock. Maybe then it won't curl.
Start early. I get jittery when the end of the week gets close and I haven't even started.
Clean up my craft area while I go along, otherwise I can't find a thing.
Shop with a coupon at the craft store.
Be me and don't compare myself to others.
Thank the Lord daily for the ability to create!

So there you have it! 

I sincerely hope each of you have a blessed week in the Lord!

Colossians 3:23-24 (NIV)
Whatever you do, work at it with all your heart, as working for the Lord, not for human masters, since you know that you will receive an inheritance from the Lord as a reward. It is the Lord Christ you are serving.


Who makes you smile?!


Saturday, December 7, 2013

Christmas Ornament Exchange

I couldn't resist participating in the Christmas Ornament Exchange,  hosted by Vicki, over at Life On Willie May Lane.  Some of the participants were agreeable to sending ornaments around the world. 
The big question for each of us was, "Where will my ornament come from?" 


I was so excited when mine arrived and it came from the U.K., Truro to be exact!
The lovely Barbara over at Cornish Cream gave me some very special gifts.
The heart ornament is made from Thai Silk that she purchased on a trip to Thailand and embellished it with beautiful gold ribbon and poinsettias!


Included is a lovely lavender scented sachet, two Afternoon Teas, a delightful handmade gift tag (which will not find its way on anyone's gift because it is too pretty! I think I will use it as a bookmark.), and a sweet note from Barbara, written on a gorgeous handmade card! 

We have corresponded a coupe of times already and I am so happy to have a friend in the U.K.! I'm looking forward to getting to know Barbara even better in 2014.

I want to thank Vicky for hosting this exciting exchange! I'm sure there's a lot of work that goes into organizing so many ladies. Hop on over and see what everyone received by clicking here.

Wishing you all a very Merry Christmas!


Friday, November 22, 2013

Easy to make Autumn or Thanksgiving Wreath

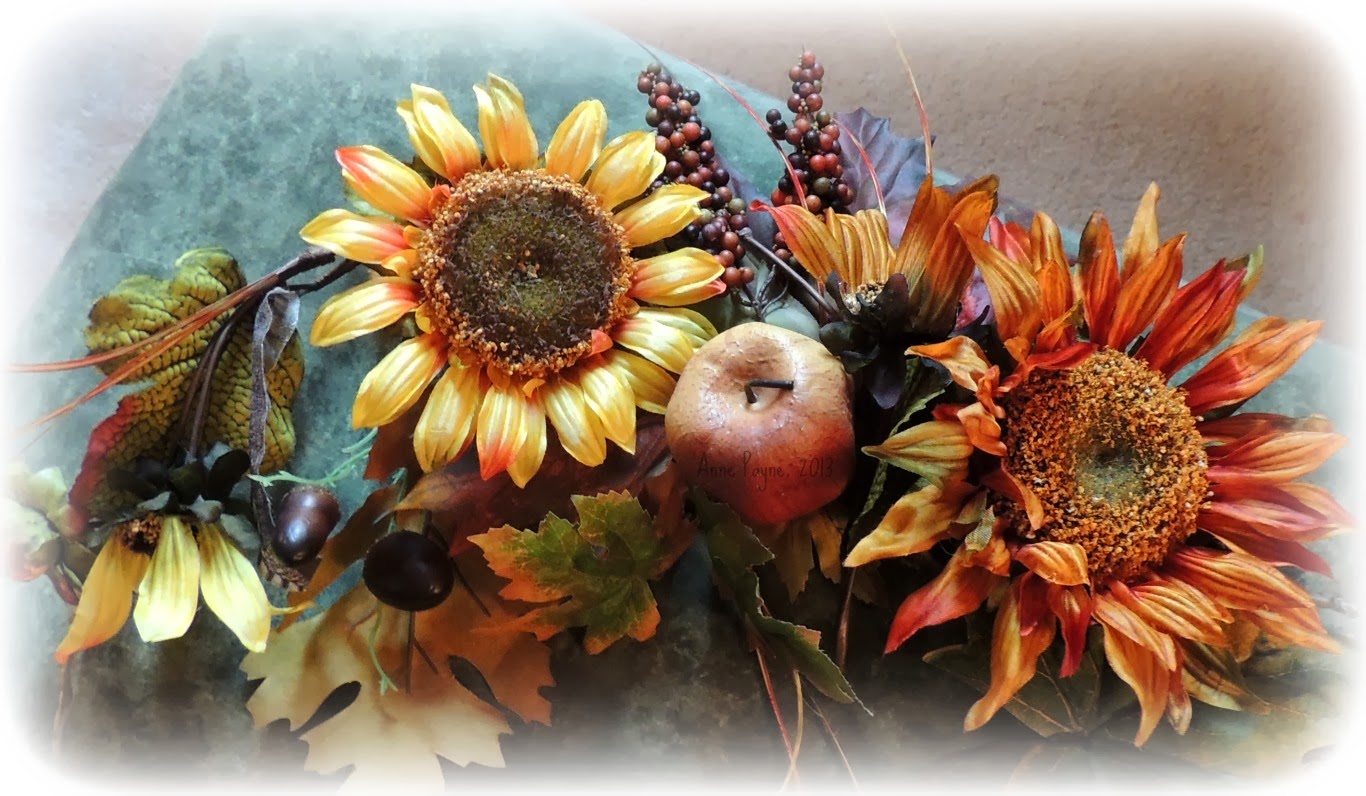
I am always late getting a seasonally appropriate wreath made for the front door. This year is no exception. With less than a week to go before Thanksgiving, it may seem useless to even make one. However, I couldn't pass up an 80% off sale of all autumn florals at Hobby Lobby! I unpinned the cloth flowers off my basic wreath that is made from a foam circle and burlap to get it ready for a new look.


While I was at HL, I couldn't pass up this awesome purple hot glue gun! 
I needed a new one anyway :)


I snipped apart some of the floral spray pieces to make it easier to handle and attach to the wreath.


I'm quite fond of mums and sunflowers. 
And I loved the acorns and apple in this particular spray.


Even though these beautiful flowers are silk, they still bring a smile to my face. 
Sunflowers and Mums breath warmth and hospitality!


I tried to follow pretty closely the way they were pre-arranged on the spray when I glued them down. I think I need a few more leaves around the bottom but overall I am quite satisfied. 


Floral arranging of any kind is not my forte'. My daughter, on the other hand, is very good at making wreaths. Maybe I will showcase some of her work in December. 

Do you make your own wreaths or buy them ready-made?

Have a blessed day in the Lord!

Sharing with

The Chicken Chick
thursday blog hop

The Self Sufficient HomeAcre


Sunday, February 10, 2013

Quick & Easy Heart Wreath

I don't usually do any crafting for Valentine's Day anymore since my children are pretty much grown,  but I saw this cute DIY Heart Wreath over at The Happy Runner and couldn't resist giving it a try.

Who knows, maybe next year I will make one with my grand children.
It's that easy and kid-friendly!

The instructions are pretty simple.
Shape a piece of lightweight wire into a heart.

♥ My husband did this for me since I have slightly arthritic hands ♥


Cut a bunch of strips (at least 50, depending on the size of your wire frame) about 1" x 4" (or 6" if you prefer).  They don't have to be perfectly cut unless you are a perfectionist...which I'm not.
You can use anything, I think. The Happy Runner used an old shirt but I used felt. 
It looks kind of pink but it is red.


Tie each strip onto the wire that you bent and shaped until you had that great heart shaped frame.

And then you have this...


It didn't come out too bad but there are a few things I would have done different:
Used a lighter wire
Made a larger frame
Made a less obvious hanger


I'm linked up at:


Did you make any Valentine's Day crafts? If so, what did you make?


Happy Valentine's Day!

NEWLY LINKED UP @
The Enchanting Rose

Monday, November 12, 2012

Day 4 ~ An Attitude of Gratitude

Day 4: Time

Starting Point: 
How do you spend your time?  Are you a get up and go person?  Or do you spend time procrastinating?

Watch the video.  What would you do with the extra 7.5 minutes?

Quote:
God gave you a gift of 86,400 seconds today. Have you used one to say “thank you?” 
William A. Ward

Bible verse:
Everything on earth has its own time and its own season.
Ecclesiastes 3:1 (CEV)

Technique Challenge:
Try stamping with an embossing folder.  
If you don’t have one then stamp using whatever you have.


That's the prompts for Day 4 at An Attitude of Gratitude. Come on and join along. 

It's never too late to start being 

h a N k F u l   

This whole journal thing is hard for me. I'm trying to step outside of my neat and tidy box, and I am not happy with this day at all. I didn't have an embossing folder, so I used a piece of flocked scrapbook paper, inked it and stamped on the hounds tooth design with it. 


I cut and pasted the Bible verse, outlining it with yellow sharpie ( I know this will not last), it was all I had on hand. I wanted to pull in some of the yellow from the bookmark I used to describe what I do while I am procrastinating :) I then wrote that I need to spend more time reading the Word of God!  


Did you know that there are 86,400 seconds in a day?! 


Remember to use at least one of them to tell someone Thank You!

Thanks for stopping by to see what I'm up to. I hope you had a great weekend and told a Veteran 'Thank You' for their service to our great country!

Have a great day in the Lord!